
Posted on

Wi-Fi 6 Mesh Development with IPQ5018 & IPQ5010: WallysTech DR5018S Source Code Now on GitHub

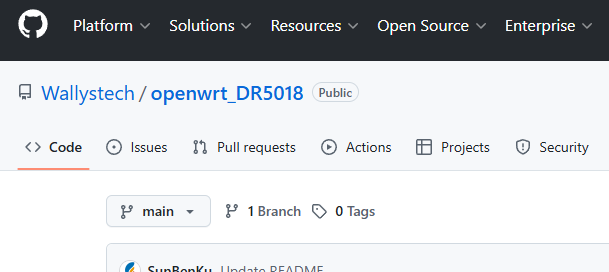
🚀 WallysTech Releases Open-Source DR5018S Mesh Solution on GitHub!

We’re excited to announce that the DR5018S Mesh solution — optimized, tested, and production-ready — has now been fully open-sourced on GitHub.
Built on OpenWrt and enhanced through extensive real-world deployments, this solution is designed for teams working on Wi-Fi 6 / ath11k Mesh networks.

🔍 Why We Open-Sourced It

Mesh networking is essential in industrial IoT, outdoor coverage, enterprise networking, and large-scale distributed systems.
Yet many teams still struggle with:
• Unstable links
• Slow backhaul recovery
• Performance drops in high-density environments
• Limited ath11k Mesh reference designs

After deep testing and tuning in our own projects, we’ve created a stable, engineering-grade Mesh implementation — and we want to share it with the community.

⭐ What’s Inside

✔ Optimized Mesh link logic
✔ Faster reconnection & self-healing
✔ Lower latency during link interruptions
✔ NSS-accelerated forwarding
✔ Mesh configs, tuning parameters, and deployment guides
✔ Driver & firmware-related adjustments for ath11k

💡 About DR5018S

Powered by the Qualcomm IPQ5018 Wi-Fi 6 SoC, DR5018S is proven in harsh environments such as mines, oil fields, campuses, smart cities, and enterprise networks.
It supports flexible roles as both access and backhaul nodes — and is available with an industrial IP68 outdoor enclosure.

📦 GitHub Repository

🔗 [ GitHub link]

We’ve included examples, configs, debugging tips, and FAQs to help teams go from “it works” to “it works reliably.”

🤝 Join the Mesh Open-Source Community

If you’re building on Wi-Fi 6 or ath11k Mesh, we invite you to try the solution, share feedback, open issues, or submit PRs.
For large-scale deployments or custom requirements, our team is happy to support — just reach out.

Let’s build the next generation of Mesh networks together. 💡🌐

🚀 Key Features

1. High-Performance Platform Based on IPQ5018

  • Qualcomm IPQ5018 chip, dual-core ARM Cortex-A53 @ 1.0GHz
  • 512MB DDR3L system memory, 128MB NAND Flash storage
  • Hardware NAT acceleration supporting high-concurrency network connections

2. Complete Mesh Network Support

  • Natively integrated B.A.T.M.A.N. Advanced Mesh protocol
  • Supports multi-hop routing and dynamic topology discovery
  • Automatic link quality assessment and routing optimization

3. Enterprise-Level Functions

  • Supports WPA3 enterprise-grade security encryption
  • VLAN isolation and multi-SSID management
  • Centralized network management and monitoring
  • Supports Captive Portal and billing systems

DR5018S Mesh product family : https://524wifi.net/?s=mesh&post_type=product

Posted on

Support 524 wifi 6 DR9074 Tri-band card on rockchip-5b

Dear Linux users,

Please see our reference guide how to run QCN 9024 / 9074 DR9074-Triband module with our ath11k driver on Rockship board .

The driver is sensitive to the hardware, so we refer you to use the Rockchip board to try these driver. If you have a bigger project, then lets discuss on the driver issues or send us the hardware description and we would help you to develope the ath11k driver for your application.

First step, download development for rockchip-5b:

you can get source code by

git clone https://github.com/Joshua-Riek/ubuntu-rockchip

Use -ko compilation option can only build the kernel to deb, -uo can only build uboot and -ro can only build rootfs.

Then, you can move to development create you img by

./build.sh –board=rock-5b –suite=oracular –flavor=desktop

Then download our ath11k driver from our ftp, dowload teh DR9074 rockchip.rar file :

https://wifi5.eu/dls/Wallys/DR9074

In order to support tri band cards, modifications need to be made to the kernel module.

Firstly, the ath11k_pci module needs to be added to support QCOM PCI cards. Move config.common.ubuntu to

build/linux-rockchip/debian.rockchip/config/config.common.ubuntu

in the compiled environment. This directory may not be available in the newly downloaded environment. You can compile the kernel to obtain this directory.

Move mac.c to

build/linux-rockchip/drivers/net/wireless/ath/ath11k/mac.c

Move reg.c to

build/linux-rockchip/drivers/net/wireless/ath/ath11k/reg.c

Compile the kernel so you can get a new kernel deb with ath11k_pci.

Secondly, the correct firmware of the WiFi card is also required to activate it, you can move our firmware (amss.bin, board-2.bin) to:

/lib/firmware/ath11k/QCN9074/hw1.0

and delete the amss.bin.zst and board-2.bin.zst from the directory.

Setup wireless on ubuntu

Download hostapd

 you can download hostapd by use command:

sudo apt-get install hostapd

Use hostapd to create a wireless access point

First, you should turn off ubuntu’s wifi tool by this command:

sudo nmcli radio wifi off

it will block you wifi function unblock wifi by use this command:

sudo rfkill unblock wifi

You can setup an access point by using command:

sudo hostapd hostapd.conf

hostapd.config is a configuration which has set the type of wi-fi you want to enable and the following figure shows its typical structure:

I have marked the most important part with a red box, where ssid represents the name of the wifi and interface represents the device selected to enable wifi. By the way if you don’t know your interface name, you can use command: ip addr    which can show you the information about the interface, the wireless interface always seem like wlan* or wlp*.

If you see following output after you use hostapd command:

this means you have successfully started the AP.

And when you see this:

it means a device connected to you access point.

This also means connect if you not set password:

Use wpa_supplicant to connect a access point

First, you should turn off ubuntu’s wifi tool by this command:

sudo nmcli radio wifi off

it will block you wifi function unblock wifi by use this command:

sudo rfkill unblock wifi

You can connect an access point by using command:

sudo wpa_supplicant  -Dnl80211 -iwlp1s0 -c wpa.conf

-i can set the interface you want to use to connect. wpa.config is a configuration which has set the type of wi-fi you want to connect and the following figure shows its typical structure:

you can change the ssid to which access point you want.

If you see following output after you use hostapd command:

this means connect successful.

If you want to connect a access point which has a password you should change the wpa_supplicant configuration like this:

the psk is the password proto and key_mgmt is the encryption options.

FAQ

when you see this output you can use: sudo rfkill unblock wifi

when you see this output that means you may run another wpa_supplicant, you should close it then you can run another wpa_supplicant if you don’t know where is it, you can use command: sudo killall wpa_supplicant to kill all wpa_supplicant.
