Posted on

Do you need to use an eSIM in Linux systems?

You probably know how traditional SIM cards works, but do you know how to use an eSIM in Linux ? And how well does eSIM work in a Linux environment?

Good news is that it’s possible to get a module with an eSIM up and running on your machine with a bit of configuration. So after this confusing title, we will be using an eUICC SGP.22 SIM – “consumer eSIM” and Host computer (x86_64 running Ubuntu 24.04) with Cellular module (SIMCom SIM8230G-M2 or SIM8262E M2 for example)

Step 1:

Make sure you have the correct drivers installed for your module. We see here that the module exposes a QMI interfaces which we bind to qmi_wwan and 3 serial ports bound to option.

APL01:~$ lsusb -t
/:  Bus 001.Port 001: Dev 001, Class=root_hub, Driver=xhci_hcd/8p, 480M
    |__ Port 004: Dev 013, If 0, Class=Vendor Specific Class, Driver=option, 480M
    |__ Port 004: Dev 013, If 1, Class=Vendor Specific Class, Driver=option, 480M
    |__ Port 004: Dev 013, If 2, Class=Vendor Specific Class, Driver=option, 480M
    |__ Port 004: Dev 013, If 3, Class=Vendor Specific Class, Driver=qmi_wwan, 480M
/:  Bus 002.Port 001: Dev 001, Class=root_hub, Driver=xhci_hcd/7p, 5000M

Step 2:

In order to use QMI, install libqmi 1.35.5 or later.
First we need some dependencies: meson ninja-build pkg-config bash-completion libgirepository1.0-dev help2man libglib2.0-dev libgudev-1.0-dev libmbim-glib-dev libqrtr-glib-dev
In our case, these packages were already installed.

APL01:~$ sudo apt-get install -y meson ninja-build git pkg-config bash-completion libgirepository1.0-dev help2man libglib2.0-dev libgudev-1.0-dev libmbim-glib-dev libqrtr-glib-dev
[sudo] password for jakob:
Reading package lists... Done
Building dependency tree... Done
Reading state information... Done
meson is already the newest version (1.3.2-1ubuntu1).
ninja-build is already the newest version (1.11.1-2).
ninja-build set to manually installed.
pkg-config is already the newest version (1.8.1-2build1).
bash-completion is already the newest version (1:2.11-8).
bash-completion set to manually installed.
libgirepository1.0-dev is already the newest version (1.80.1-1).
help2man is already the newest version (1.49.3).
libglib2.0-dev is already the newest version (2.80.0-6ubuntu3.2).
libgudev-1.0-dev is already the newest version (1:238-5ubuntu1).
libmbim-glib-dev is already the newest version (1.31.2-0ubuntu3).
libqrtr-glib-dev is already the newest version (1.2.2-1ubuntu4).
0 upgraded, 0 newly installed, 0 to remove and 146 not upgraded.

Step 3:

Download libqmi, build and install it.
Git directory: https://gitlab.freedesktop.org/mobile-broadband/libqmi.git
meson setup build –prefix=/usr –buildtype=release
ninja -j$(nproc) -C build
sudo ninja -C build install

APL01:~$ git clone https://gitlab.freedesktop.org/mobile-broadband/libqmi.git
Cloning into 'libqmi'...
remote: Enumerating objects: 17636, done.
remote: Counting objects: 100% (1308/1308), done.
remote: Compressing objects: 100% (380/380), done.
remote: Total 17636 (delta 889), reused 1300 (delta 882), pack-reused 16328 (from 1)
Receiving objects: 100% (17636/17636), 4.97 MiB | 6.57 MiB/s, done.
Resolving deltas: 100% (13472/13472), done.

APL01:~$ cd libqmi
APL01:~/libqmi$ meson setup build --prefix=/usr --buildtype=release
The Meson build system
Version: 1.3.2
Source dir: /home/jakob/libqmi
Build dir: /home/jakob/libqmi/build
Build type: native build
Project name: libqmi
Project version: 1.35.6
...

APL01:~/libqmi$ ninja -j$(nproc) -C build
ninja: Entering directory `build'
[176/176] Generating src/libqmi-glib/Qmi-1.0.typelib with a custom command

APL01:~/libqmi$ sudo ninja -C build install
ninja: Entering directory `build'
[0/1] Installing files.
Installing src/libqmi-glib/generated/qmi-error-types.h to /usr/include/libqmi-glib
Installing src/libqmi-glib/generated/qmi-enum-types.h to /usr/include/libqmi-glib
Installing src/libqmi-glib/generated/qmi-flag-types.h to /usr/include/libqmi-glib
Installing src/libqmi-glib/generated/qmi-flags64-types.h to /usr/include/libqmi-glib
Installing src/libqmi-glib/generated/qmi-atr.h to /usr/include/libqmi-glib
Installing src/libqmi-glib/generated/qmi-dms.h to /usr/include/libqmi-glib
Installing src/libqmi-glib/generated/qmi-dpm.h to /usr/include/libqmi-glib
Installing src/libqmi-glib/generated/qmi-dsd.h to /usr/include/libqmi-glib
Installing src/libqmi-glib/generated/qmi-ims.h to /usr/include/libqmi-glib
Installing src/libqmi-glib/generated/qmi-imsa.h to /usr/include/libqmi-glib
...
...

APL01:~/libqmi$ qmicli --version
qmicli 1.35.6
Copyright (C) 2012-2023 Aleksander Morgado
License GPLv2+: GNU GPL version 2 or later <http://gnu.org/licenses/gpl-2.0.html>
This is free software: you are free to change and redistribute it.
There is NO WARRANTY, to the extent permitted by law.

Step 4:

Lpac requires some additional dependencies: build-essential libpcsclite-dev libcurl4-openssl-dev zip
Download lpac via git
Git directory: https://github.com/estkme-group/lpac.git
We use QMI as noted, so we will enable the QMI flag.
Make and install.

APL01:~/lpac$ sudo apt-get install -y build-essential libpcsclite-dev libcurl4-openssl-dev zip
Reading package lists... Done
Building dependency tree... Done
Reading state information... Done
...
...

APL01:~$ git clone https://github.com/estkme-group/lpac.git
Cloning into 'lpac'...
remote: Enumerating objects: 2865, done.
remote: Counting objects: 100% (647/647), done.
remote: Compressing objects: 100% (256/256), done.
remote: Total 2865 (delta 540), reused 399 (delta 389), pack-reused 2218 (from 3)
Receiving objects: 100% (2865/2865), 1.04 MiB | 4.17 MiB/s, done.
Resolving deltas: 100% (1922/1922), done.

APL01:~/lpac$ git checkout tags/v2.3.0
Note: switching to 'tags/v2.3.0'.
...
HEAD is now at c2fcf5e chore: bump version to 2.3.0

jakob@jakob-UP-APL01:~/lpac$ cmake -B lpacoutput -DLPAC_WITH_APDU_QMI=ON
-- The C compiler identification is GNU 13.3.0
-- Detecting C compiler ABI info
-- Detecting C compiler ABI info - done
-- Check for working C compiler: /usr/bin/cc - skipped
-- Detecting C compile features
-- Detecting C compile features - done
-- Found PkgConfig: /usr/bin/pkg-config (found version "1.8.1")
-- Checking for module 'libpcsclite'
--   Found libpcsclite, version 2.0.3
-- Found PCSCLite: /usr/lib/x86_64-linux-gnu/libpcsclite.so
-- Checking for module 'qmi-glib'
--   Found qmi-glib, version 1.35.6
-- Found CURL: /usr/lib/x86_64-linux-gnu/libcurl.so (found version "8.5.0")
-- Found Git: /usr/bin/git (found version "2.43.0")
-- Configuring done (2.1s)
-- Generating done (0.0s)
-- Build files have been written to: /home/jakob/lpac/lpacoutput

APL01:~/lpac$ cmake --build lpacoutput
[  1%] Building C object cjson/CMakeFiles/cjson-static.dir/cJSON.c.o
[  3%] Building C object cjson/CMakeFiles/cjson-static.dir/cJSON_ex.c.o
[  5%] Linking C static library libcjson-static.a
[  5%] Built target cjson-static
[  7%] Building C object euicc/CMakeFiles/euicc.dir/base64.c.o
...
[ 98%] Building C object src/CMakeFiles/lpac.dir/applet/profile/nickname.c.o
[100%] Linking C executable ../lpacoutput/lpac
[100%] Built target lpac

APL01:~/lpac$ sudo cmake --install lpacoutput
-- Install configuration: ""
-- Installing: /usr/local/bin/lpac
-- Set non-toolchain portion of runtime path of "/usr/local/bin/lpac" to "/usr/local/lib/lpac"

Step 5:

Export qmi function and qmi_device for lpac to use the correct driver.

APL01:~$ export LPAC_APDU=qmi
APL01:~$ export LPAC_APDU_QMI_DEVICE=/dev/cdc-wdm0

Step 6:

Use lpac to gather chip information and handle the eSIM itself.
We pipe the command with jq to get it more readable.
Chip info.
This displays the information of the eUICC you are using with your device.

APL01:~/drivertest/qmi_wwan$ sudo -E lpac chip info | jq .
{
  "type": "lpa",
  "payload": {
    "code": 0,
    "message": "success",
    "data": {
      "eidValue": "8XXXXXXXXXXXXXXXXXXXXXXXXXXXXXX0",
      "EuiccConfiguredAddresses": {
        "defaultDpAddress": "smdp-plus-1.eu.cd.rsp.kigen.com",
        "rootDsAddress": "lpa.ds.gsma.com"
      },
      "EUICCInfo2": {
        "profileVersion": "2.3.1",
        "svn": "2.3.0",
        "euiccFirmwareVer": "36.16.23",
        "extCardResource": {
          "installedApplication": 6,
          "freeNonVolatileMemory": 213008,
          "freeVolatileMemory": 9058
        },
        "uiccCapability": [
          "usimSupport",
          "isimSupport",
          "csimSupport",
          "akaMilenage",
          "akaCave",
          "akaTuak128",
          "akaTuak256",
          "gbaAuthenUsim",
          "gbaAuthenISim",
          "eapClient",
          "javacard",
          "multipleUsimSupport",
          "multipleIsimSupport",
          "multipleCsimSupport"
        ],
        "ts102241Version": "15.1.0",
        "globalplatformVersion": "2.3.0",
        "rspCapability": [
          "additionalProfile",
          "testProfileSupport"
        ],
        "euiccCiPKIdListForVerification": [
          "8XXXXXXXXXXXXXXXXXXXXXXXXXXXXXXXXXXXXXb"
        ],
        "euiccCiPKIdListForSigning": [
          "8XXXXXXXXXXXXXXXXXXXXXXXXXXXXXXXXXXXXXb"
        ],
        "euiccCategory": null,
        "forbiddenProfilePolicyRules": [
          "ppr1"
        ],
        "ppVersion": "1.0.0",
        "sasAcreditationNumber": "KN-XX-XX-XXXX",
        "certificationDataObject": {
          "platformLabel": null,
          "discoveryBaseURL": null
        }
      },
      "rulesAuthorisationTable": [
        {
          "pprIds": [
            "ppr1",
            "ppr2"
          ],
          "allowedOperators": [
            {
              "plmn": "eeeeee",
              "gid1": null,
              "gid2": null
            }
          ],
          "pprFlags": [
            "consentRequired"
          ]
        }
      ]
    }
  }
}

Profile list

This shows all profiles in your eUICC.

APL01:~$ sudo -E lpac profile list | jq .
{
  "type": "lpa",
  "payload": {
    "code": 0,
    "message": "success",
    "data": [
      {
        "iccid": "8944476500000515770",
        "isdpAid": "a0000005591010ffffffff8900001100",
        "profileState": "disabled",
        "profileNickname": "test",
        "serviceProviderName": "BetterRoaming",
        "profileName": "BetterRoaming",
        "iconType": null,
        "icon": null,
        "profileClass": "operational"
      },
      {
        "iccid": "8944476500000932264",
        "isdpAid": "a0000005591010ffffffff8900001300",
        "profileState": "disabled",
        "profileNickname": null,
        "serviceProviderName": "BetterRoaming",
        "profileName": "BetterRoaming",
        "iconType": null,
        "icon": null,
        "profileClass": "operational"
      }
    ]
  }
}

Profile download

This downloads a profile to your eUICC.

APL01:~$ sudo -E lpac profile download -a 'LPA:1$rsp.truphone.com$QRF-SPEEDTEST'
{"type":"progress","payload":{"code":0,"message":"es10b_get_euicc_challenge_and_info","data":"rsp.truphone.com"}}
{"type":"progress","payload":{"code":0,"message":"es9p_initiate_authentication","data":"rsp.truphone.com"}}
{"type":"progress","payload":{"code":0,"message":"es10b_authenticate_server","data":"rsp.truphone.com"}}
{"type":"progress","payload":{"code":0,"message":"es9p_authenticate_client","data":"rsp.truphone.com"}}
{"type":"progress","payload":{"code":0,"message":"es8p_meatadata_parse","data":{"iccid":"8944476500001126791","serviceProviderName":"Speedtest Travel","profileName":"BetterRoaming","iconType":null,"icon":null,"profileClass":null}}}
{"type":"progress","payload":{"code":0,"message":"es10b_prepare_download","data":"rsp.truphone.com"}}
{"type":"progress","payload":{"code":0,"message":"es9p_get_bound_profile_package","data":"rsp.truphone.com"}}
{"type":"progress","payload":{"code":0,"message":"es10b_load_bound_profile_package","data":"rsp.truphone.com"}}
{"type":"lpa","payload":{"code":0,"message":"success","data":null}}

Profile list

Here we can see that our profile we just downloaded is available on the SIM.

APL01:~$ sudo -E lpac profile list | jq .
{
  "type": "lpa",
  "payload": {
    "code": 0,
    "message": "success",
    "data": [
      {
        "iccid": "8944476500000515770",
        "isdpAid": "a0000005591010ffffffff8900001100",
        "profileState": "disabled",
        "profileNickname": "test",
        "serviceProviderName": "BetterRoaming",
        "profileName": "BetterRoaming",
        "iconType": null,
        "icon": null,
        "profileClass": "operational"
      },
      {
        "iccid": "8944476500000932264",
        "isdpAid": "a0000005591010ffffffff8900001300",
        "profileState": "disabled",
        "profileNickname": null,
        "serviceProviderName": "BetterRoaming",
        "profileName": "BetterRoaming",
        "iconType": null,
        "icon": null,
        "profileClass": "operational"
      },
      {
        "iccid": "8944476500001126791",
        "isdpAid": "a0000005591010ffffffff8900001400",
        "profileState": "disabled",
        "profileNickname": null,
        "serviceProviderName": "Speedtest Travel",
        "profileName": "BetterRoaming",
        "iconType": null,
        "icon": null,
        "profileClass": "operational"
      }
    ]
  }
}

Enable profile

In order to enable a profile, you enable it with it’s corresponding ICCID, making sure you get a success message.

APL01:~$ sudo -E lpac profile enable 89357XXXXXXXXXXXXX
{"type":"lpa","payload":{"code":0,"message":"success","data":null}}

Process notification

Make sure the SM-DP+ server knows the profile is downloaded, installed and enabled correctly.
After successfully processed, you can delete old notifications.

APL01:~$ sudo -E lpac notification process -a
{"type":"progress","payload":{"code":0,"message":"es10b_list_notification","data":null}}
{"type":"progress","payload":{"code":0,"message":"es10b_retrieve_notifications_list","data":"77"}}
{"type":"progress","payload":{"code":0,"message":"es9p_handle_notification","data":"77"}}
{"type":"progress","payload":{"code":0,"message":"es10b_retrieve_notifications_list","data":"78"}}
{"type":"progress","payload":{"code":0,"message":"es9p_handle_notification","data":"78"}}
{"type":"progress","payload":{"code":0,"message":"es10b_retrieve_notifications_list","data":"79"}}
{"type":"progress","payload":{"code":0,"message":"es9p_handle_notification","data":"79"}}
{"type":"lpa","payload":{"code":0,"message":"success","data":null}}

IMPORTANT

If you disable and delete a profile, it is important that you process the notifications to make sure the SM-DP+ server knows you have handed the profile back.

Posted on

QCN9274 / QCN6274 Chip | x86 & Ubuntu Support | Enterprise Grade Networking

524WiFi DR9274 Wi-Fi 7 PCIe Card

QCN9274/QCN6274 Chip | x86 & Ubuntu Support | Enterprise-Grade Networking

High-Density, Low-Latency Wireless Solutions for Industrial IoT & Enterprise WiFi 7 Deployments

Introduction: The Next Era of Enterprise Wireless Connectivity

The rapid evolution of Wi-Fi 7 (IEEE 802.11be) is revolutionizing enterprise networks, demanding hardware that combines cutting-edge performance with seamless integration. The 524WiFi DR9274 PCIe Wireless Card, powered by Qualcomm QCN9274/QCN6274 chips, emerges as a game-changer. Designed for x86 architecture and fully compatible with Ubuntu systems, this module delivers multi-gigabit speeds, industrial-grade reliability, and future-proof scalability — ideal for high-stakes environments like smart factories, dense office networks, and mission-critical IoT deployments.

5 Key Advantages of 524WiFi DR9274 Wi-Fi 7 Modules

1. x86 & Ubuntu Compatibility: Unleash Developer Flexibility

  • Native x86 Support: Seamlessly integrates with Intel/AMD-based servers, industrial PCs, and edge gateways, eliminating driver conflicts.
  • Ubuntu 22.04 LTS Optimization: Pre-certified drivers and SDKs enable rapid deployment on Linux environments, with full access to OpenWRT/OpenWiFi for custom network policies.
  • Use Case: Deploy as a software-defined access point (SDAP) or cloud-managed wireless controller on existing x86 infrastructure.

2. Wi-Fi 7 Performance: Redefining Wireless Limits

  • 320MHz Channel Bandwidth: Achieves ~40Gbps aggregate throughput — 2x faster than WiFi 6E.
  • 4K QAM Modulation: Boosts data density by 20%, enhancing bandwidth-hungry applications like 8K video streaming and AR/VR.
  • Multi-Link Operation (MLO): Transmits data across 2.4GHz, 5GHz, and 6GHz bands, reducing latency to <1ms for industrial automation.

3. Flexible Deployment: Single/Dual-Band Configurations

  • Single-Band Models: Optimized for interference-free 6GHz backhaul or dedicated 5GHz IoT sensor networks.
  • Dual-Band Models: Combine 5GHz+6GHz for enterprise-grade mesh networks or 2.4GHz+5GHz for legacy device compatibility.
  • Example: Deploy 5GHz+6GHz dual-band cards in stadiums to handle 10,000+ concurrent users with zero packet loss.

4. Industrial Durability: Built for Harsh Environments

  • Extended Temperature Range: Operates at -40°C to +85°C, certified for outdoor smart grids and factory floors.
  • Hardened Security: Supports WPA3-Enterprise, AES-256 encryption, and Secure Boot to meet NIST compliance.
  • Open-Source Firmware: Customize QoS rules, VLAN tagging, and spectrum analysis via OpenWRT.

5. Qualcomm QCN9274/QCN6274: A Proven Silicon Foundation

  • 16-Stream MU-MIMO: Supports 500+ devices per card with dynamic beamforming.
  • Hardware Accelerators: Offloads CPU load for tasks like packet prioritization and intrusion detection.

Application Scenarios: Where Wi-Fi 7 Drives Transformation

1. Enterprise Wi-Fi 7 Networks

  • High-Density Offices: Support 200+ users per AP with zero buffering in 4K video conferencing.
  • HD Telemedicine: Enable real-time transmission of MRI/CT scans over 6GHz wireless links.

2. Industrial IoT & Automation

  • AGV Fleet Control: Achieve sub-millisecond latency for robotic coordination in smart warehouses.
  • Wireless PLCs: Replace wired EtherCAT networks with secure 5GHz wireless loops.

3. Carrier & Smart City Infrastructure

  • Wireless Backhaul: Replace fiber with 6GHz point-to-point links for 5G small cell aggregation.
  • Public Wi-Fi 7 Hotspots: Deploy in airports or malls with captive portals and AI-driven traffic shaping.

4. Defense & Mission-Critical Systems

  • Tactical Mesh Networks: Build self-healing wireless grids using MLO and 4K QAM.
  • Drone Command Centers: Stream 360° LiDAR data via 320MHz channels.

Conclusion: Future-Proof Your Wireless Infrastructure Today

The DR9274 Wi-Fi 7 PCIe Card transcends traditional wireless limitations by merging Qualcomm’s silicon excellence, x86/Ubuntu adaptability, and industrial resilience. Whether upgrading enterprise networks, automating factories, or building smart city backbones, this module delivers unparalleled speed, reliability, and control.

Posted on

524WiFi 6 QCA 9024 / 6024 modules adapted to UBuntu22.04.01, 20.04.6, 20.04.1, 18.04.6 operating system versions under X86 architecture – test reports.

X86 Industrial Computer + QCN9024 DR9024 MINI PCIE Interface 1v1 and 1v100 Performance Test Report:

Test purpose: Test the performance of QCN9024 network card with industrial computer 1v1 and 1v10
Test tool: Ixchariot 6.7
Test equipment: X86 industrial computer + MINI PCIE QCN9024 DR9024 module

X86 as STA test environment:

  1. Self-developed equipment as AP, X86 industrial computer as STA
  2. Chariot traffic test
    Test 1: STA to AP traffic, throughput 2145Mbps

Test 2: AP sends traffic to STA, throughput 2318Mbps

Test 3: AP and STA bidirectional traffic, throughput 2660Mbps

X86 as AP test environment:

  1. Self-developed equipment as STA, X86 industrial computer as AP
  2. Chariot traffic test
    Test 1: AP to STA traffic, throughput 2215Mbps

Test 2: STA sends data to AP, throughput 2271Mbps

Test 3: AP and STA bidirectional traffic, throughput 2603Mbps

X86 Industrial Computer + QCN9024 DR9024 MINI PCIE Interface 1v1 and 1v100 Performance Test Report:

Test purpose: Test the performance of QCN9024 network card with industrial computer 1v1 and 1v10
Test tool: Ixchariot 6.7
Test equipment: X86 industrial computer + MINI PCIE QCN9024 DR9024 module

Posted on

Struggling with High-Density Networks? WiFi 7 on Ubuntu Has the Answer

How WiFi 7 Network Cards on Ubuntu Can Future-Proof Your Networking Needs

In the fast-evolving world of wireless technology, staying ahead means embracing innovation. WiFi 7, the latest generation of wireless networking, is not just an incremental upgrade—it’s a game changer. Combined with the flexibility and reliability of Ubuntu, deploying WiFi 7 network cards can open doors to unparalleled performance, adaptability, and security. Let’s explore how this powerful duo can address the growing demands of modern networks.

Meeting High-Performance Networking Demands

  1. High-Speed Local Area Networks (LANs) Enterprises require robust and ultra-fast LANs to handle data-intensive operations. WiFi 7’s Multi-Link Operation (MLO) and wider channel bandwidths deliver a seamless, high-speed experience for local connections.
  2. High-Speed Wireless Bridging Connecting remote sites without sacrificing performance is a critical challenge. WiFi 7 enables stable, high-speed wireless bridges, making it ideal for industries like smart cities, ports, and remote offices.
  3. Optimizing Networks in High-Density Scenarios Managing heavy traffic in environments like stadiums, campuses, and smart factories demands superior technology. WiFi 7’s advanced features, such as improved spectral efficiency and enhanced MU-MIMO capabilities, ensure optimal performance even under peak loads.

Why Ubuntu?

Ubuntu, as an open-source operating system, offers unparalleled flexibility for developers and enterprises. Its active community support, security features, and adaptability make it the ideal platform for integrating WiFi 7 network cards. Together, they create an ecosystem where innovation thrives and networks operate at their full potential.

Advantages of WiFi 7 Network Cards on Ubuntu

  • Performance: Exceptional speeds and reduced latency redefine network efficiency.
  • Flexibility: Open-source compatibility allows tailored solutions for unique use cases.
  • Security: Enhanced encryption and network integrity to protect sensitive data.

Why 524WiFi?

For 23 years, 524WiFi and Wallys R&D teams have specialized in WiFi protocols, continuously innovating to meet the needs of industrial and enterprise clients. Whether you’re building cutting-edge WiFi 7 solutions or optimizing existing networks, our team is here to support your goals.

Posted on

Attention Linux Developers!

dr3g11

Looking for a robust WiFi solution for your Linux Ubuntu PC? Discover the 524WiFi 6 DR9074-Triband card, which seamlessly connects to your PC via the DR3G11 adapter board on Ubuntu 22.04!

The DR9074-Triband supports selectable 2.4G, 5G, and 6G bands on a single WiFi module, powered by the Qualcomm QCN9024 chipset. It’s ideal for applications like security surveillance, hotel wireless, and specialized scenarios such as forest fire protection. With a data rate of up to 4949Mbps, it’s built to meet high-bandwidth demands in challenging environments.

dr3g11

The DR9074-Triband ensuring stable and high-speed connectivity for your most demanding projects.

Posted on

How to use QCA QCN DR 9074 TriBand 4×4 Wlan module on QCA based PCBA board or a third party x86 ecosys like Ubuntu?

NEW 524 WIFI DUAL BAND TRI-BAND DR9074 WIFI 6/6E MODULES INFO – “WE CAN HELP OUR CUSTOMERS DEVELOP ATH11K TO BE USED WITH DR9074 CARDS” :

Informations regarding Linux and OpenWRT drivers – The ath11k code from github can’t support the dual / tri band card now, it needs modification. Wallystech and 524WiFi did some changes and applied in Linux kernel version 5.17.0 – if you use different kernel version, then 524WiFi will do some work for you. That is a Linux issue, there are some incompatible with different kernel versions. So the Customer need tell us the kernel version, then we release the ath11k and board-2.bin, bdf and amss.bin to customer – all is binary. Jason, chief of development, told us : “We will build it based on the Customer’s Linux version, The kernel should be 5.17 up. The Card can be AP or Client mode on x86. We do it better than others, DR9074 Triband and Dualband cards are very good and its is powerful opportunity for all customers developing WiFi6 devices. We have software engineers and we we have resources to support all Customers tu use our WiFI6 modules“

If The Customer has big volume order, then we can open the ath11k code to the customer customer based on NDA, SLA.

NEW WIFI 6 TRIBAND AND DUAL BAND MODULES LIST. 

HOW TO USE 524WIFI 6 DR9074-TRIBAND M.2 WIFI MODULE TOGETHER WITH WALLYS ROUTER PCBA OR A THIRD PARTY X86 ECOSYS LIKE UBUNTU? AND LOADING QCN9024 QCN9074 – DR9074-TRIBAND DRIVER ON LINUX 5.17.0 – STEP-BY-STEP GUIDE !


As you know, 524WiFI recently has launched two new unique Wifi modules DR9074-Triband M.2 and DR9074E – Dual Band miniPCIe,Today, this article will present how to use the module together with target platform. OpenWRT systems also use ath11k, so the information above is same for OpenWRT users.


(1) USAGE WITH WALLYS ROUTER PCBA WITH QCA IPQ 6018 CPU AND QSDK FIRMWARE :


DR6018 PCBA x1 (the board has to be pre-flashed with an exclusive version of firmware which
we developed via QSDK and bootargs has been pre-set under U-boot CLI to ensure the correct
board_id for the module )
DR9074-Triband M.2 wifi module x1

wallys pcba router board with the module

After we plug the module onboard and power on, we can access to the GUI webpage via board’s default ip address 192.168.1.1, login (admin / asdf1234)

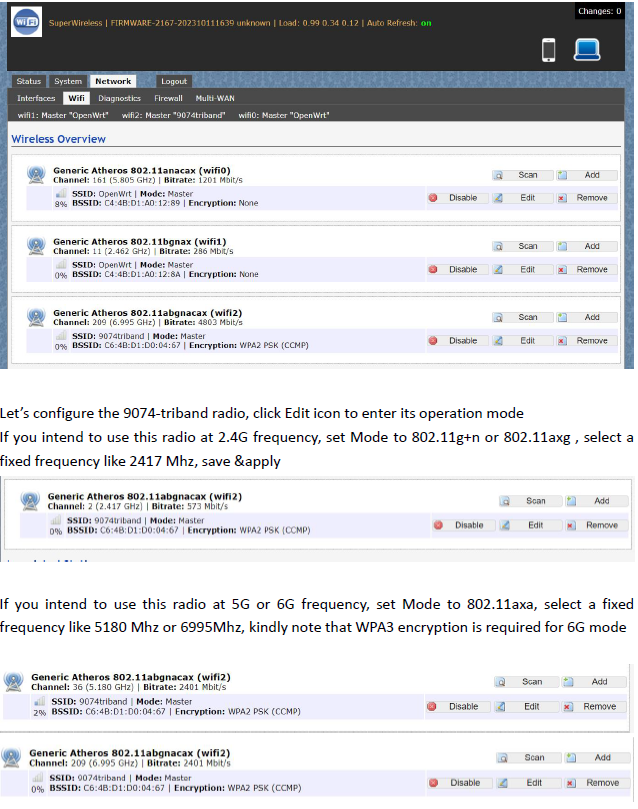
Network>Wifi, at this section, as we can see, there are three radios available, they are Wifi0(2.4G radio),Wifi1(2.4G radio), Wifi2(9074-triband selectable radio)

Let’s configure the 9074-triband radio, click Edit icon to enter its operation mode. If you intend to use this radio at 2.4G frequency, set Mode to 802.11g+n or 802.11axg , select a
fixed frequency like 2417 Mhz, save &apply

config page

If you intend to use this radio at 5G or 6G frequency, set Mode to 802.11axa, select a fixed frequency like 5180 Mhz or 6995Mhz, kindly note that WPA3 encryption is required for 6G mode

Bitrate can be up to 4803Mbit/s under 160Mhz channel spectrum width, both 5G and 6G mode support 160Mhz channel spectrum width. And the 9074-triband module can work under both ap and sta mode

tri band selectabl config

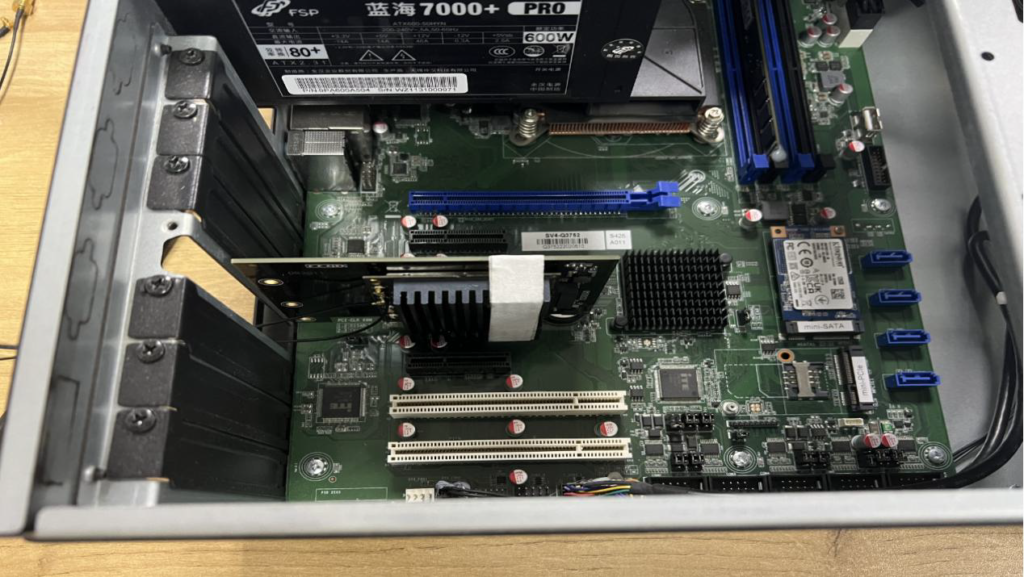
(2) USAGE WITH X86 PLATFORM UBUNTU


Desktop PC x1 installed Ubuntu 22.04
DR9074-triband module x1
DR3G11 adpater x1 – https://www.524wifi.com/index.php/catalogsearch/result/?q=dr3g11

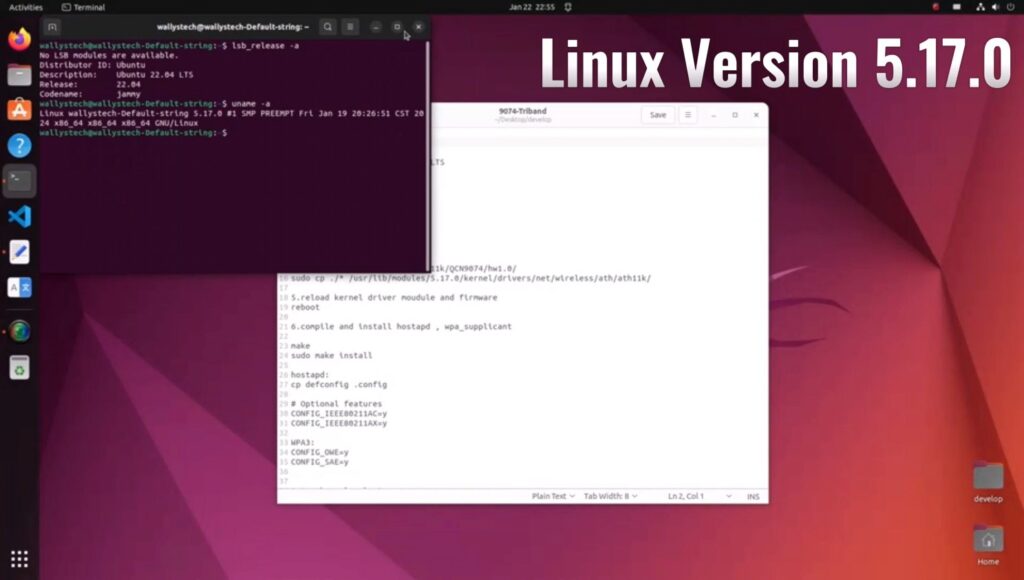
The kernel version is 5.17.0 which integrated ath11k driver
Use this command ‘sudo hostapd -dd /etc/hostapd/hostapd.conf ’to enable the module under AP mode

UBUNTU system config

The module can work under STA mode as well, and this command need to be run ‘ sudo wpa_supplicant -Dnl80211 -i wlp4s0 -c wpa.conf’
If you are interested in the product or have any technical questions, feel free to reach out 524WiFi or Wallys team

QCN9024 QCN9074 | LOADING DR9074-TRIBAND DRIVER ON LINUX 5.17.0 – STEP-BY-STEP GUIDE 

how to load driver linux

Wallys recently announced the compatibility of DR9074-TRIBAND with ATH11K on Linux, expanding its support beyond Qualcomm platforms to various Linux embedded systems, including Ubuntu. In this guide, we’ll walk you through the process of loading the driver for DR9074-Triband on Linux 5.17.0, demonstrating its seamless integration with ath11k. The module is showcased to function effectively in both AP (Access Point) and STA (Station) modes across the 2.4GHz, 5GHz, and 6GHz bands.

INTRODUCTION TO DR9074 (QCN9024):

DR9074-Triband equipped with the Qualcomm Atheros QCN9024 chipset, is an advanced enterprise wireless module. It incorporates a 4×4 MU-MIMO Dual Band Wireless Module, tailored for mobile access in high-bandwidth applications such as video streaming, voice communication, and data transmission. Key features include a maximum power of 23 dBm per chain, supporting data rates up to 4949Mbps. Operating in Tri-Band (2.4GHz, 5GHz, and 6GHz) with 4×4 WiFi 6E (802.11ax) and 4 spatial streams, it features an M.2 E Key Interface and PCI Express 3.0 Interface. Applications span security surveillance, commercial radio coverage, hotel wireless setups, and specialized scenarios.

Device Specifications:

  • Chipset: Qualcomm Atheros QCN9024
  • WLAN Host Interface: PCI Express 3.0
  • Frequency Range: 2.412GHz-2.472GHz & 5.18GHz-5.825GHz & 5.925GHz-7.125GHz
  • Data Rates: Maxim 23dBm per chain, up to 4949Mbps
  • Channel Spectrum Widths: Support 20/40/80/160MHz
  • Modulation Techniques: OFDMA, including BPSK, QPSK, DBPSK, DQPSK, 16-QAM, 64-QAM, 256-QAM, 1024-QAM, 4096-QAM
  • Temperature Range: Operating: -20°C to 70°C, Storage: -40°C to 90°C
  • Humidity: Operating: 5% to 95% (non-condensing), Storage: Max. 90% (non-condensing)
  • Certification: TBD
  • Reference Design: PN02.7
  • Power Consumption: TBD
  • Dimensions (WxHxD): 57mm x 63mm x 6mm

Device Setup:

  • PC with Linux 5.17.0
  • Adapter card (1pc)
  • DR9074-Triband (1pc)

Driver Loading Steps:

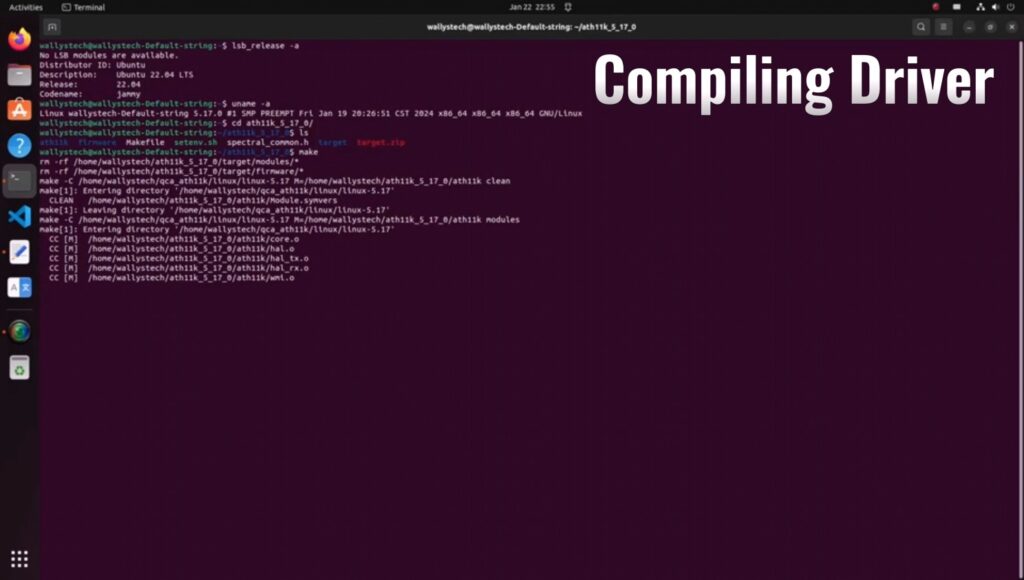
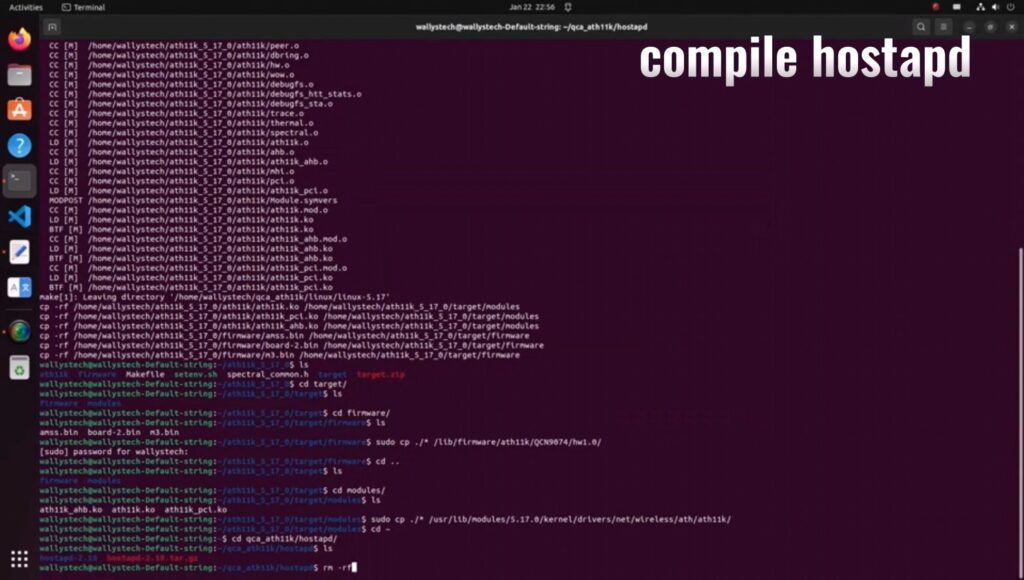
Compile the driver.

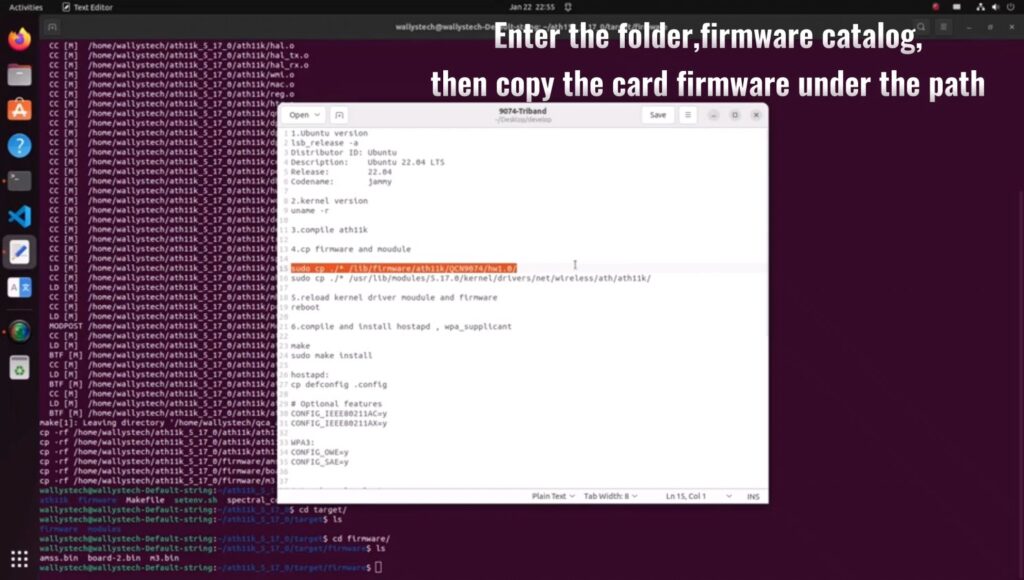
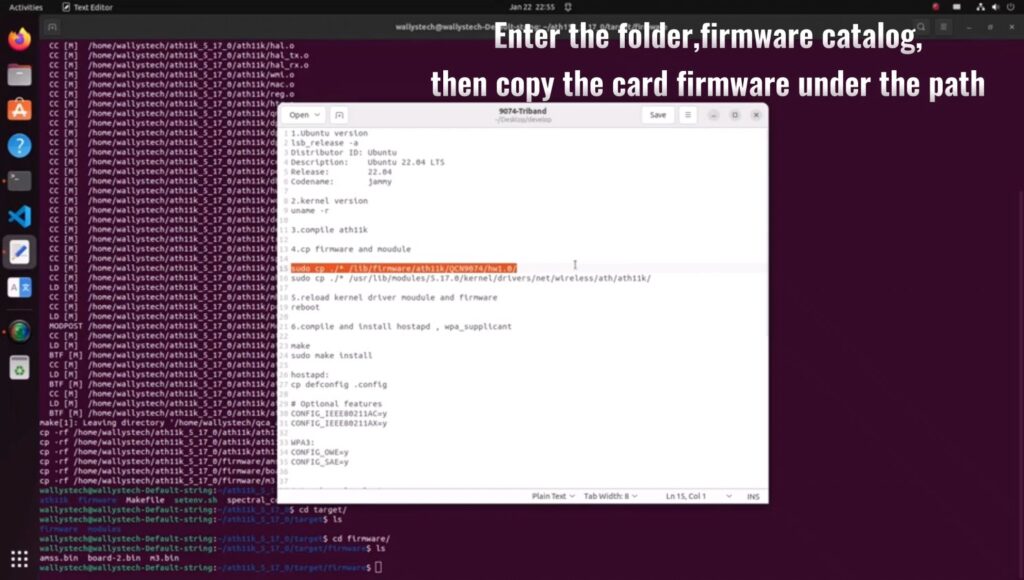
Navigate to the firmware folder and copy the card firmware.

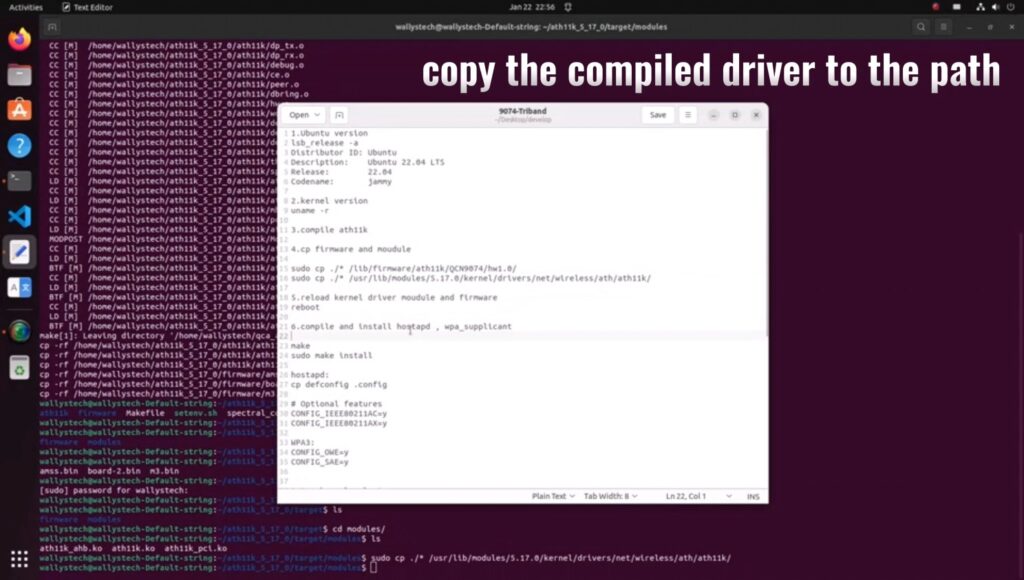
Copy the compiled driver to the designated path.

Compile hostapd.

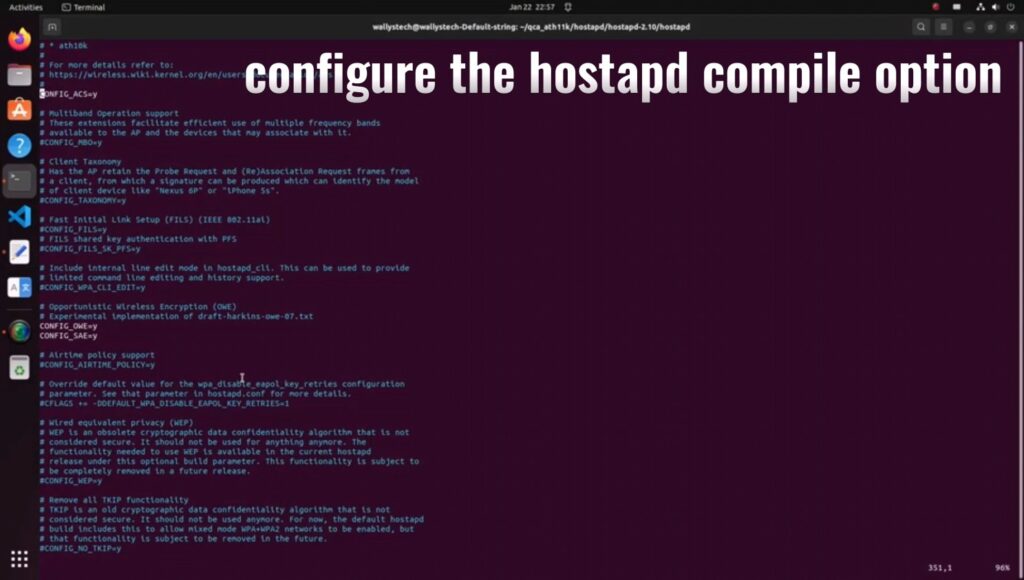
Configure hostapd compile option

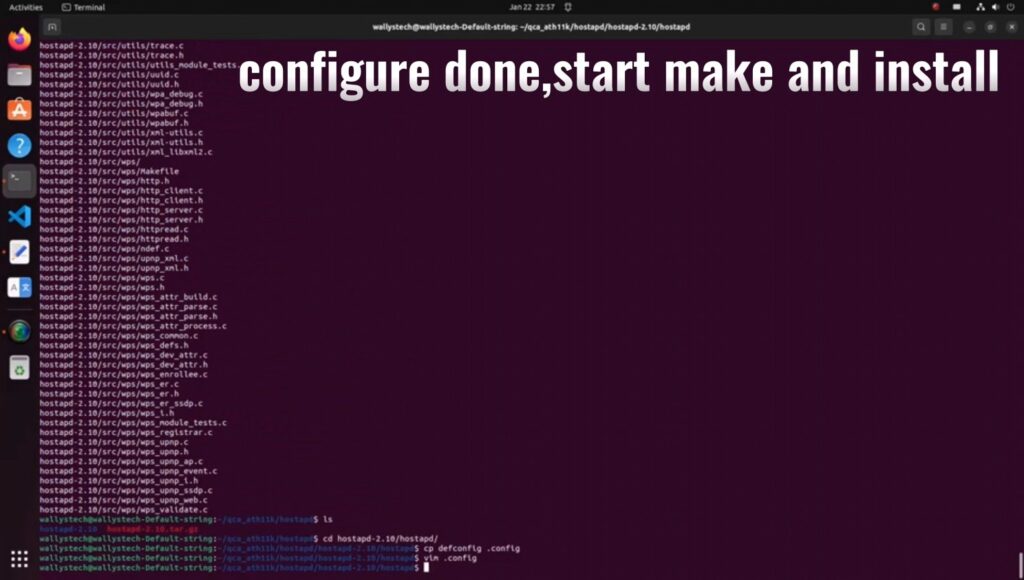
Complete configuration, commence making, and install.

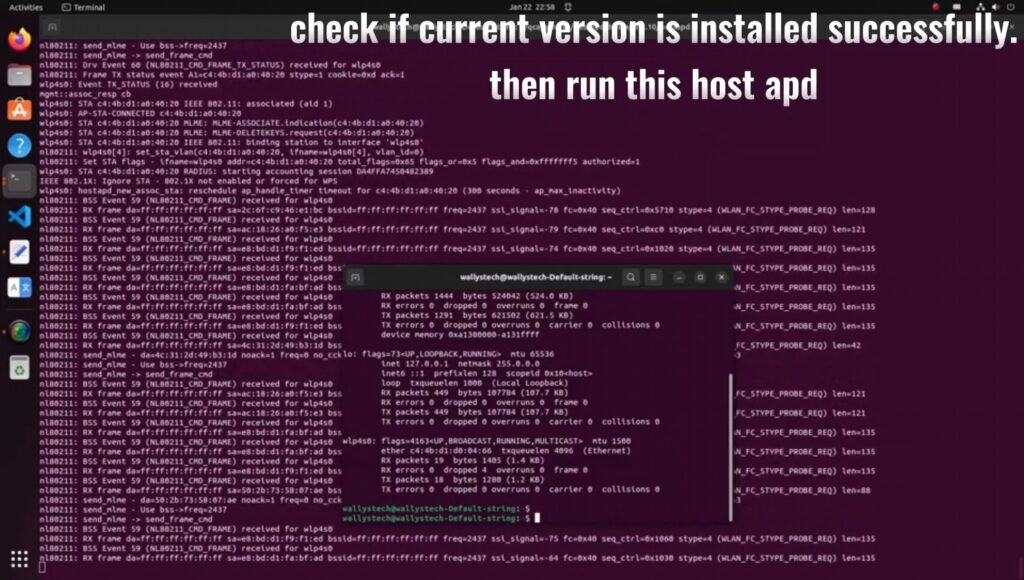
Verify the successful installation of the current version, then run hostapd.

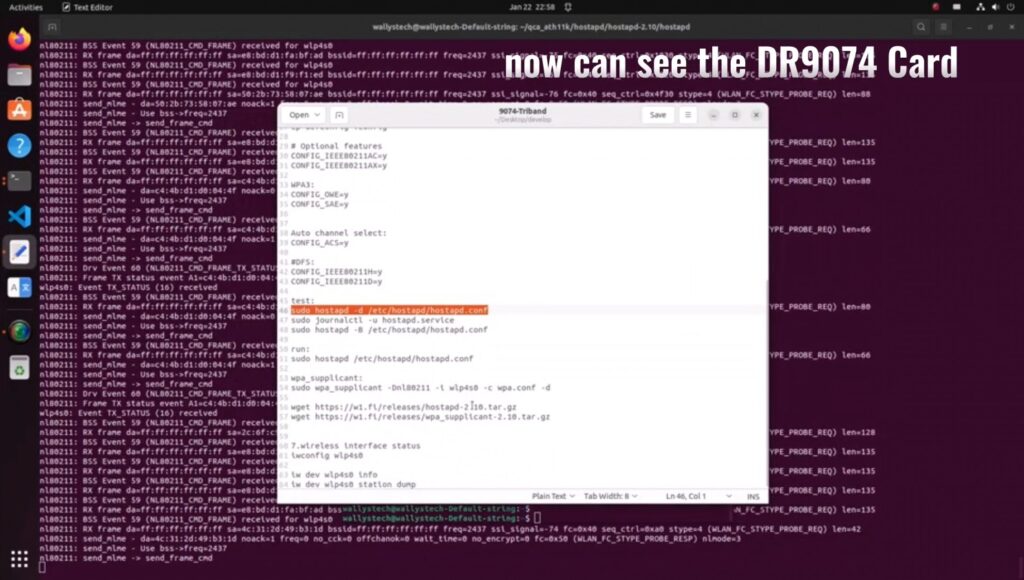
Confirm the presence of the DR9074 card.

Validate the functionality of 2.4G/5G/6G under AP mode.

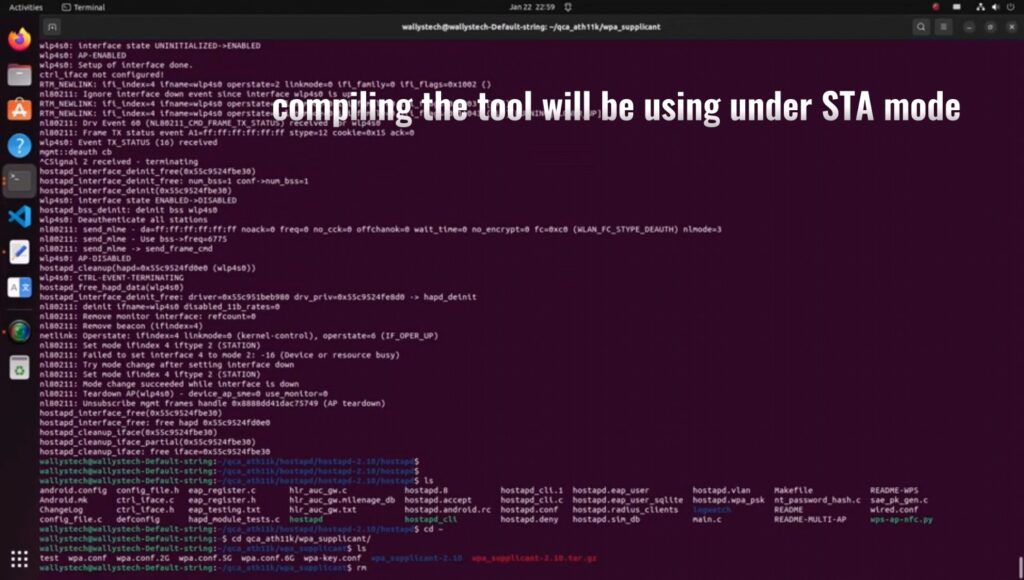
Compile the tool for STA mode and configure compile options.

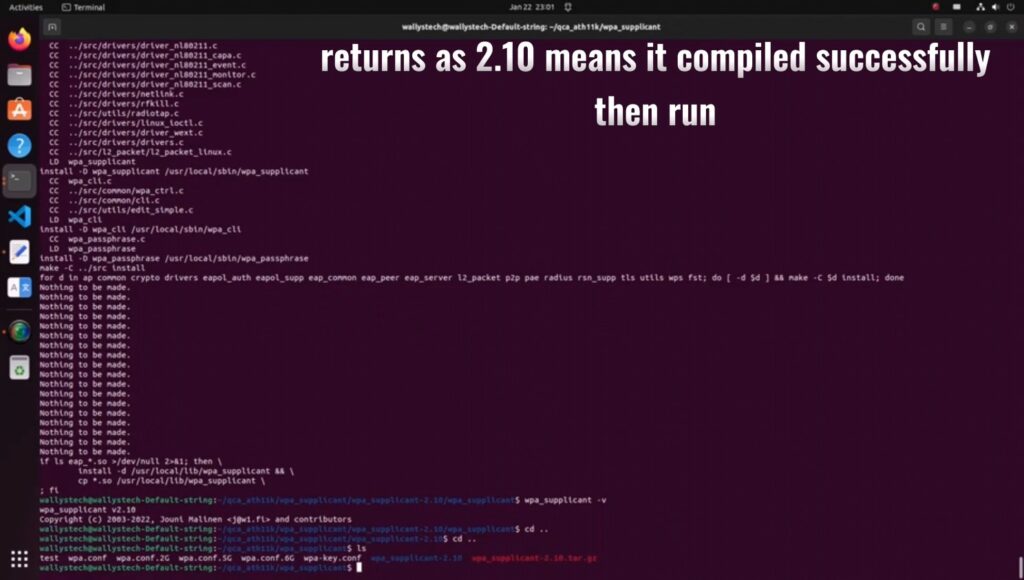
Finish compilation, check the version (returns as 2.10 for successful compilation), then run.

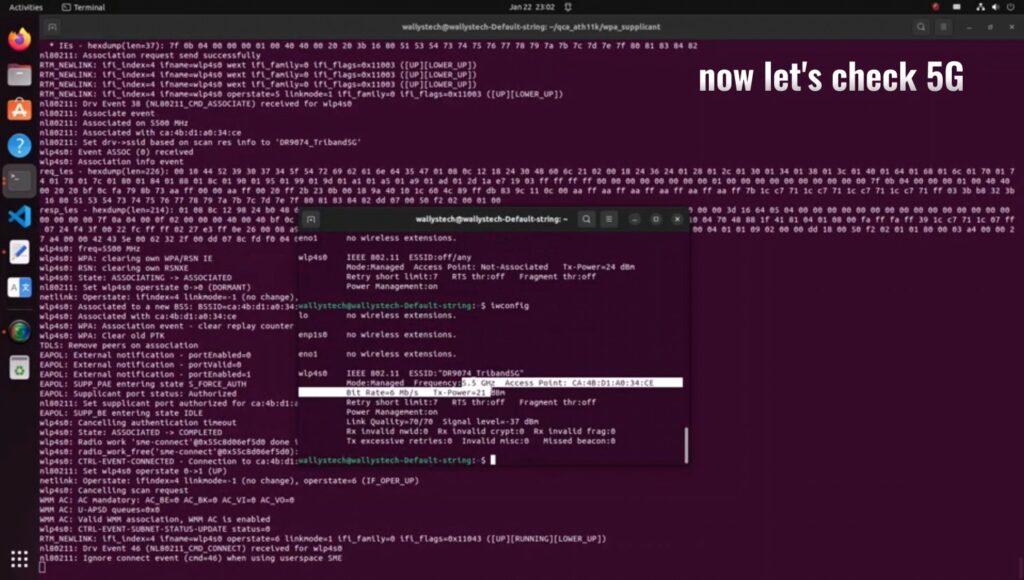
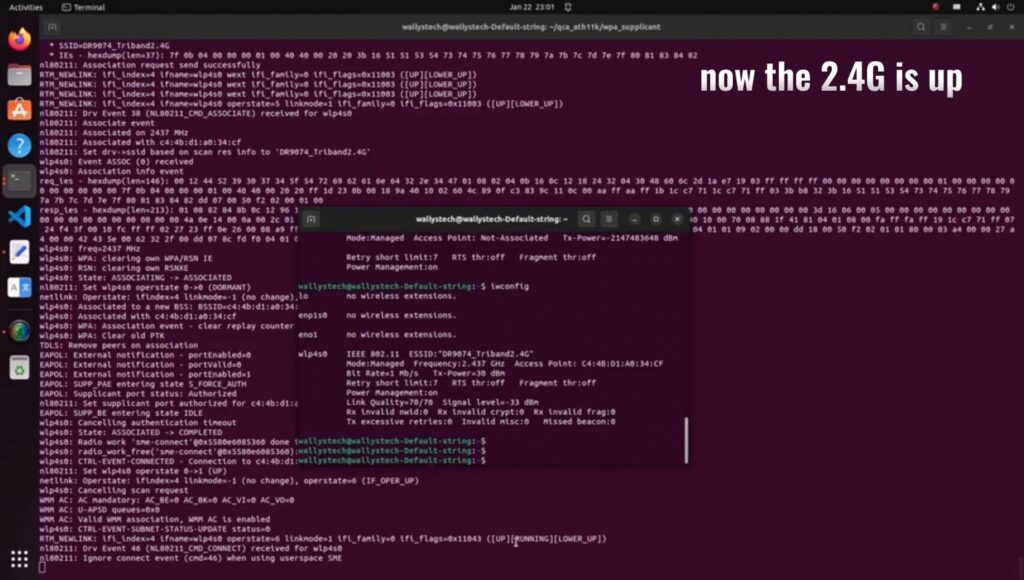
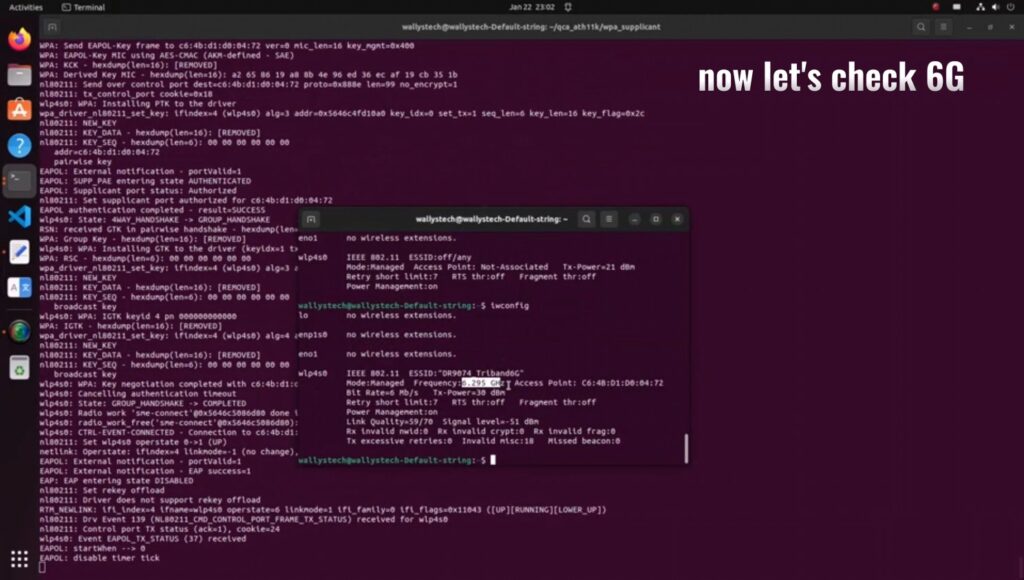
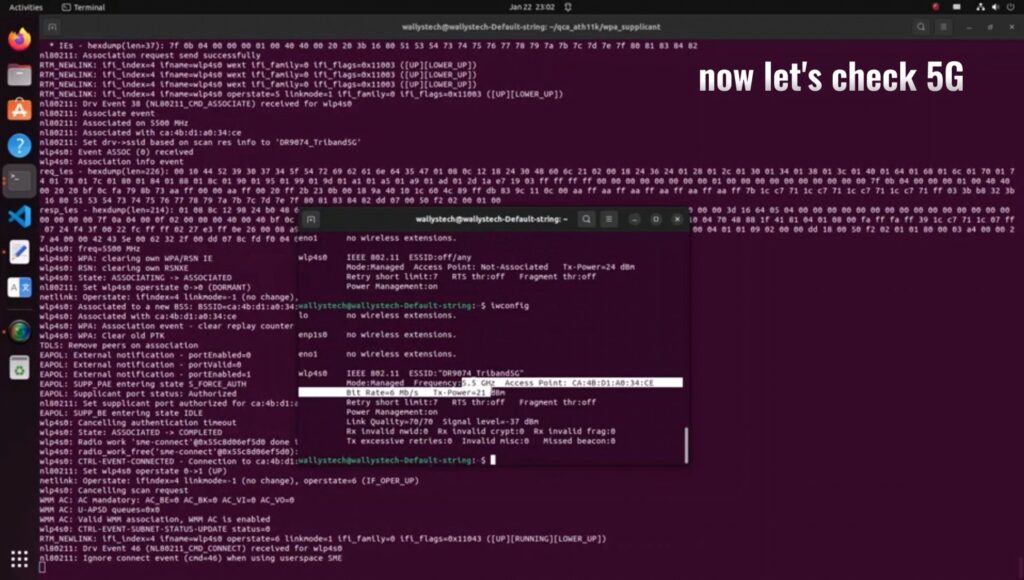
Confirm the functionality of 2.4G/5G/6G under STA mode

For any uncertainties, refer to the YouTube channel for a comprehensive video tutorial:

https://youtu.be/RL6X0xm74Fc?si=F-tuNn-wHNkeAvLB

Thanks for watching…

And now you can continue to 

How to Enable DR9074-Triband Functionality on Linux 5.17.0: Step-by-Step Guide

This tutorial builds upon the previous one and provides additional information on:

1.How to download Ubuntu 22.04.

2.How to compile the 5.17 kernel to support ath11k.